December 31, 2025
The Blueprint for Success: How We Plan Your Initial Hair Transplant

By Dr. Gary Petrus, MD, Hair Transplant Surgeon at Hair Restoration Institute
When you look in the mirror after a successful hair transplant, you see a restored hairline and renewed confidence. But what you don't see is the intricate architectural planning that made it possible.
At the Hair Restoration Institute of Minnesota, we believe that proper planning is key to successful hair transplants. A natural result isn't an accident it is the product of precise mathematical calculation, artistic design, and a customized medical strategy.
Here is a look behind the scenes at how we build your initial treatment plan. Once you are ready, you can always schedule a free hair transplant consultation online here.
1. The Consultation: Building Your Roadmap
Great results start long before the procedure day. Planning begins during your initial consultation. We don't just look at where you need hair today; we look at your "long-term plan" to ensure your results age gracefully with you.
During this phase, we answer critical questions to customize your approach:
Graft Count: What is the precise number of grafts required to achieve your density goals?
Har Characteristics: We analyze the caliber (thickness), color, and curl of your hair. For example, if we are restoring a soft hairline, we may target finer hairs; for mid-scalp density, we look for donor areas with multi-hair follicular units.
Technique Selection: We help you decide between Follicular Unit Excision (FUE) and Follicular Unit Transplant (FUT, or “Strip”) based on your lifestyle, hairstyle preferences, and donor availability.
2. The Math Behind the Art: Calculating Your Recipient Area
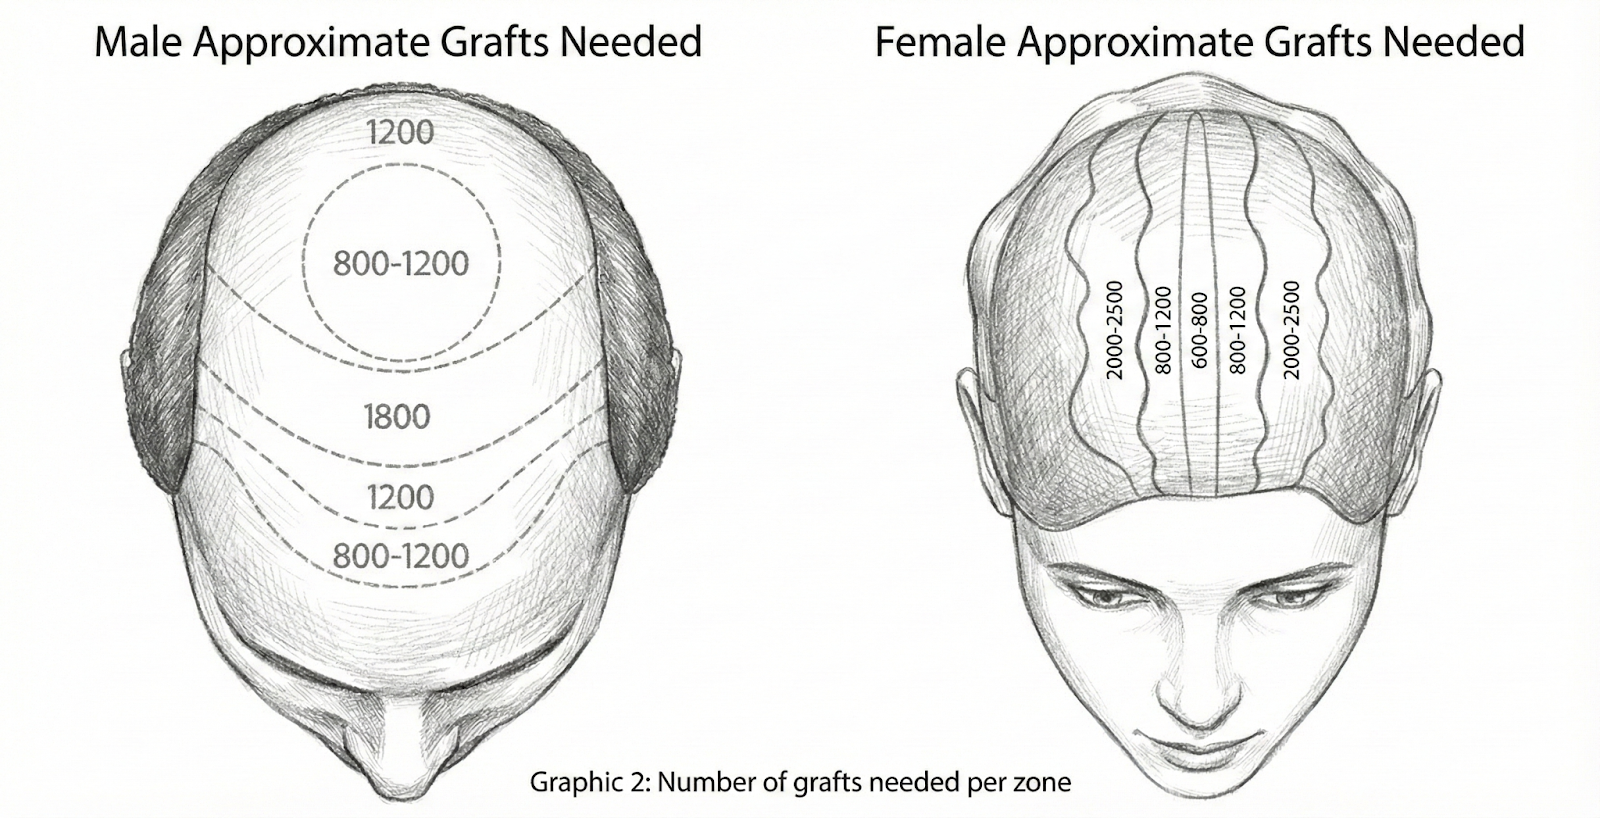
One of the most common questions we get is, "How many grafts do I need?" We don't guess. We use precise measurement techniques to calculate the surface area of your hair loss in square centimeters.
We employ advanced methods to ensure accuracy:
Geometric Formulas: By applying geometry to the shape of your hair loss (whether it's a triangle at the temples or a circle at the vertex), we can calculate the exact coverage area needed.
Scope and Magnification: We can use a 1-square centimeter stamp and magnification to count the average density of healthy hair follicles in a given region. This is especially important in thinning, as opposed to balding areas.
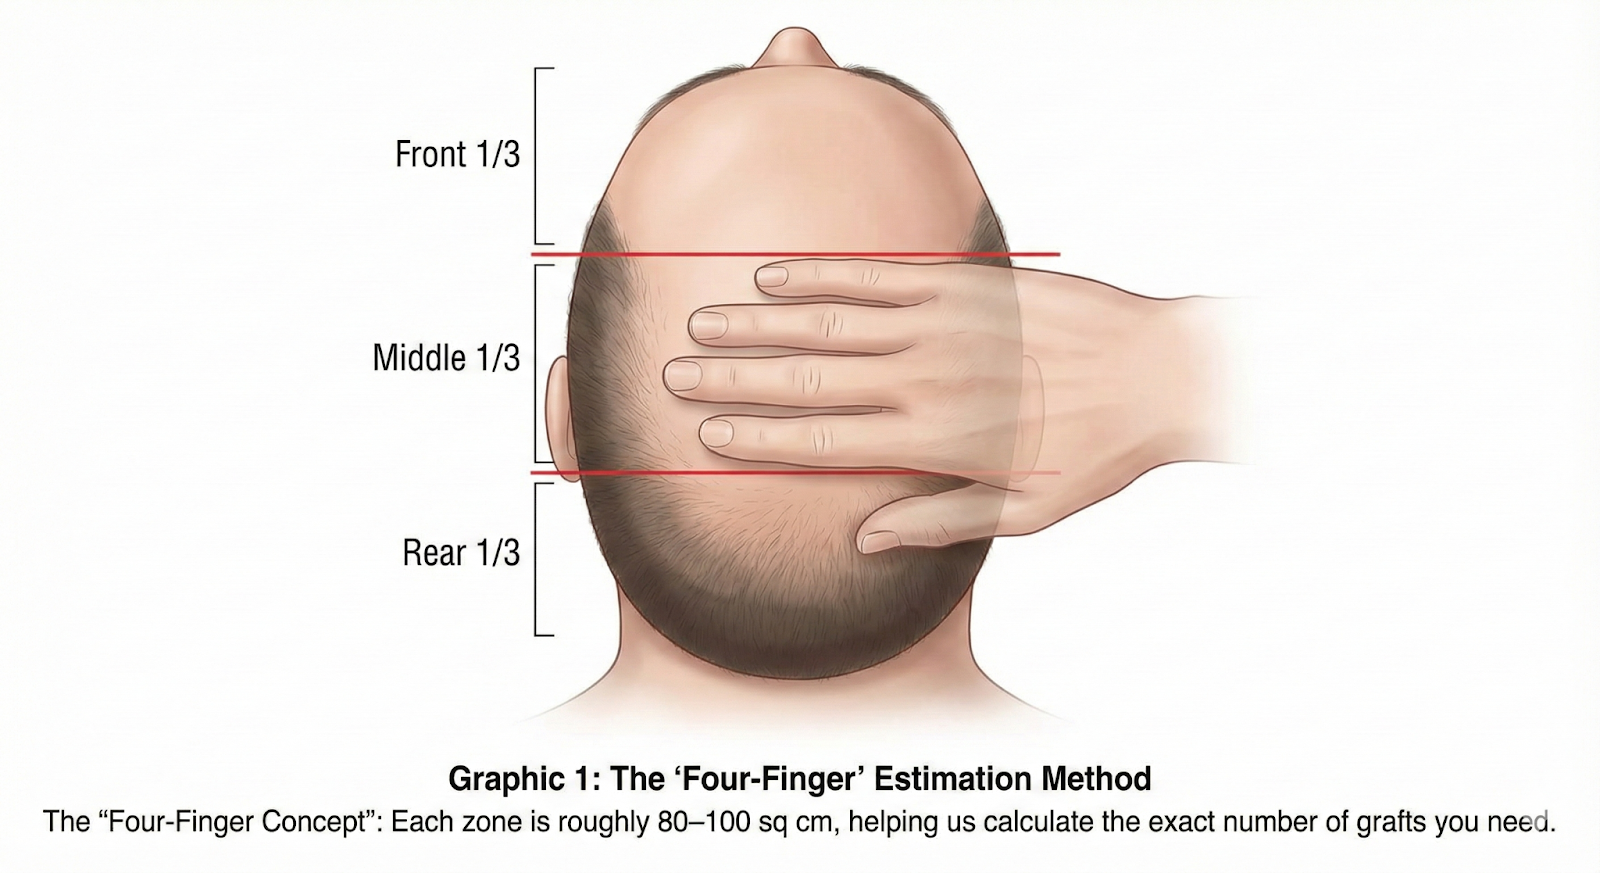
The "Four-Finger" Concept: For a quick assessment, we often divide the scalp into thirds (frontal, middle, and rear), each roughly the width of a four-finger hand (approximately 80–100 sq cm), to visualize the donor demand.
The “Palm” Method: For a very quick estimate, an adult handprint will cover an area equivalent to 2000 hair grafts on a patient with low contrast between hair color and skin tone (e.g. blond hair on light skin). The greater the contrast, the higher graft density is required and the tighter we will curl the hand to measure the 2000-graft area.
This data allows us to determine the exact density required to give you a fuller look without over-harvesting your donor area.
3. FUE vs. Strip: Planning the Harvest
A critical part of your initial treatment plan is managing your "donor bank"—the area on the back and sides of your head where hair is permanent.
The FUE Approach
If you choose FUE (Follicular Unit Excision), we meticulously plan the extraction pattern to ensure the donor area remains natural-looking.
Dispersion is Key: We disperse excisions as much as possible to avoid any patchy appearance.
Strategic Shaving: For smaller sessions (under 1,000 grafts), we can often use "zone shaving," where we shave narrow bands that can be easily concealed by the hair above, allowing you to return to work without a visible shave. We also call this an "executive FUE” as we often perform this kind of procedure on business leaders who can’t take any time away from clients, and do these as a series of treatments instead of one big procedure.
Calculated Density: We measure your donor density with a densitometer and typically harvest only 10 to 15 grafts per square centimeter to maintain the integrity of your donor hair.

The FUT (Strip) Approach
For patients requiring a larger number of grafts in a single session, FUT is often the gold standard.
Conservative Planning: We carefully plan the strip width (typically starting conservatively at 1 cm) and length to ensure the incision closes easily and heals as a fine, barely visible line. Patients with tight, firm skin will typically have a finer linear scar, whereas patients with loose, stretchy skin will often exhibit widening of the scar after surgery. Therefore, we ask that patients avoid upper body exercise and weight-lifting for 1 month post-operatively in order to minimize scar widening.
Future-Proofing: We generally place the first harvest in the "upper third" of the safe donor zone. This preserves the lower hair for future sessions and ensures the scar remains hidden even if you age into further recession.
4. Precision Engineering: The "Test Site" Advantage
On the day of surgery, we don't just start placing hairs. We perform "intraoperative planning" to ensure every graft fits perfectly.
We create "test sites"—a few initial incisions to check the depth and size against your specific grafts.
Why does this matter? If an incision is too deep, the graft can sink (pitting). If it's too shallow, the graft creates a bump (cobble-stoning).
Custom Blades: We use custom blade depth when making recipient sites in order to match the length of your follicles perfectly, ensuring the graft inserts fully and sits flush with the skin for the smoothest possible healing.
Why Experience Matters
Your initial hair transplant sets the stage for your lifetime look. The medical literature emphasizes that session sizes should be based on the "experience and skill of the surgical team" and that novice teams should not attempt large treatments.
At Hair Restoration Institute of Minnesota, we combine decades of surgical expertise with rigorous planning protocols to ensure your safety and satisfaction.
Ready to design your new look? Schedule your consultation with Hair Restoration Institute today to get a customized Initial Treatment Plan tailored to your goals.